
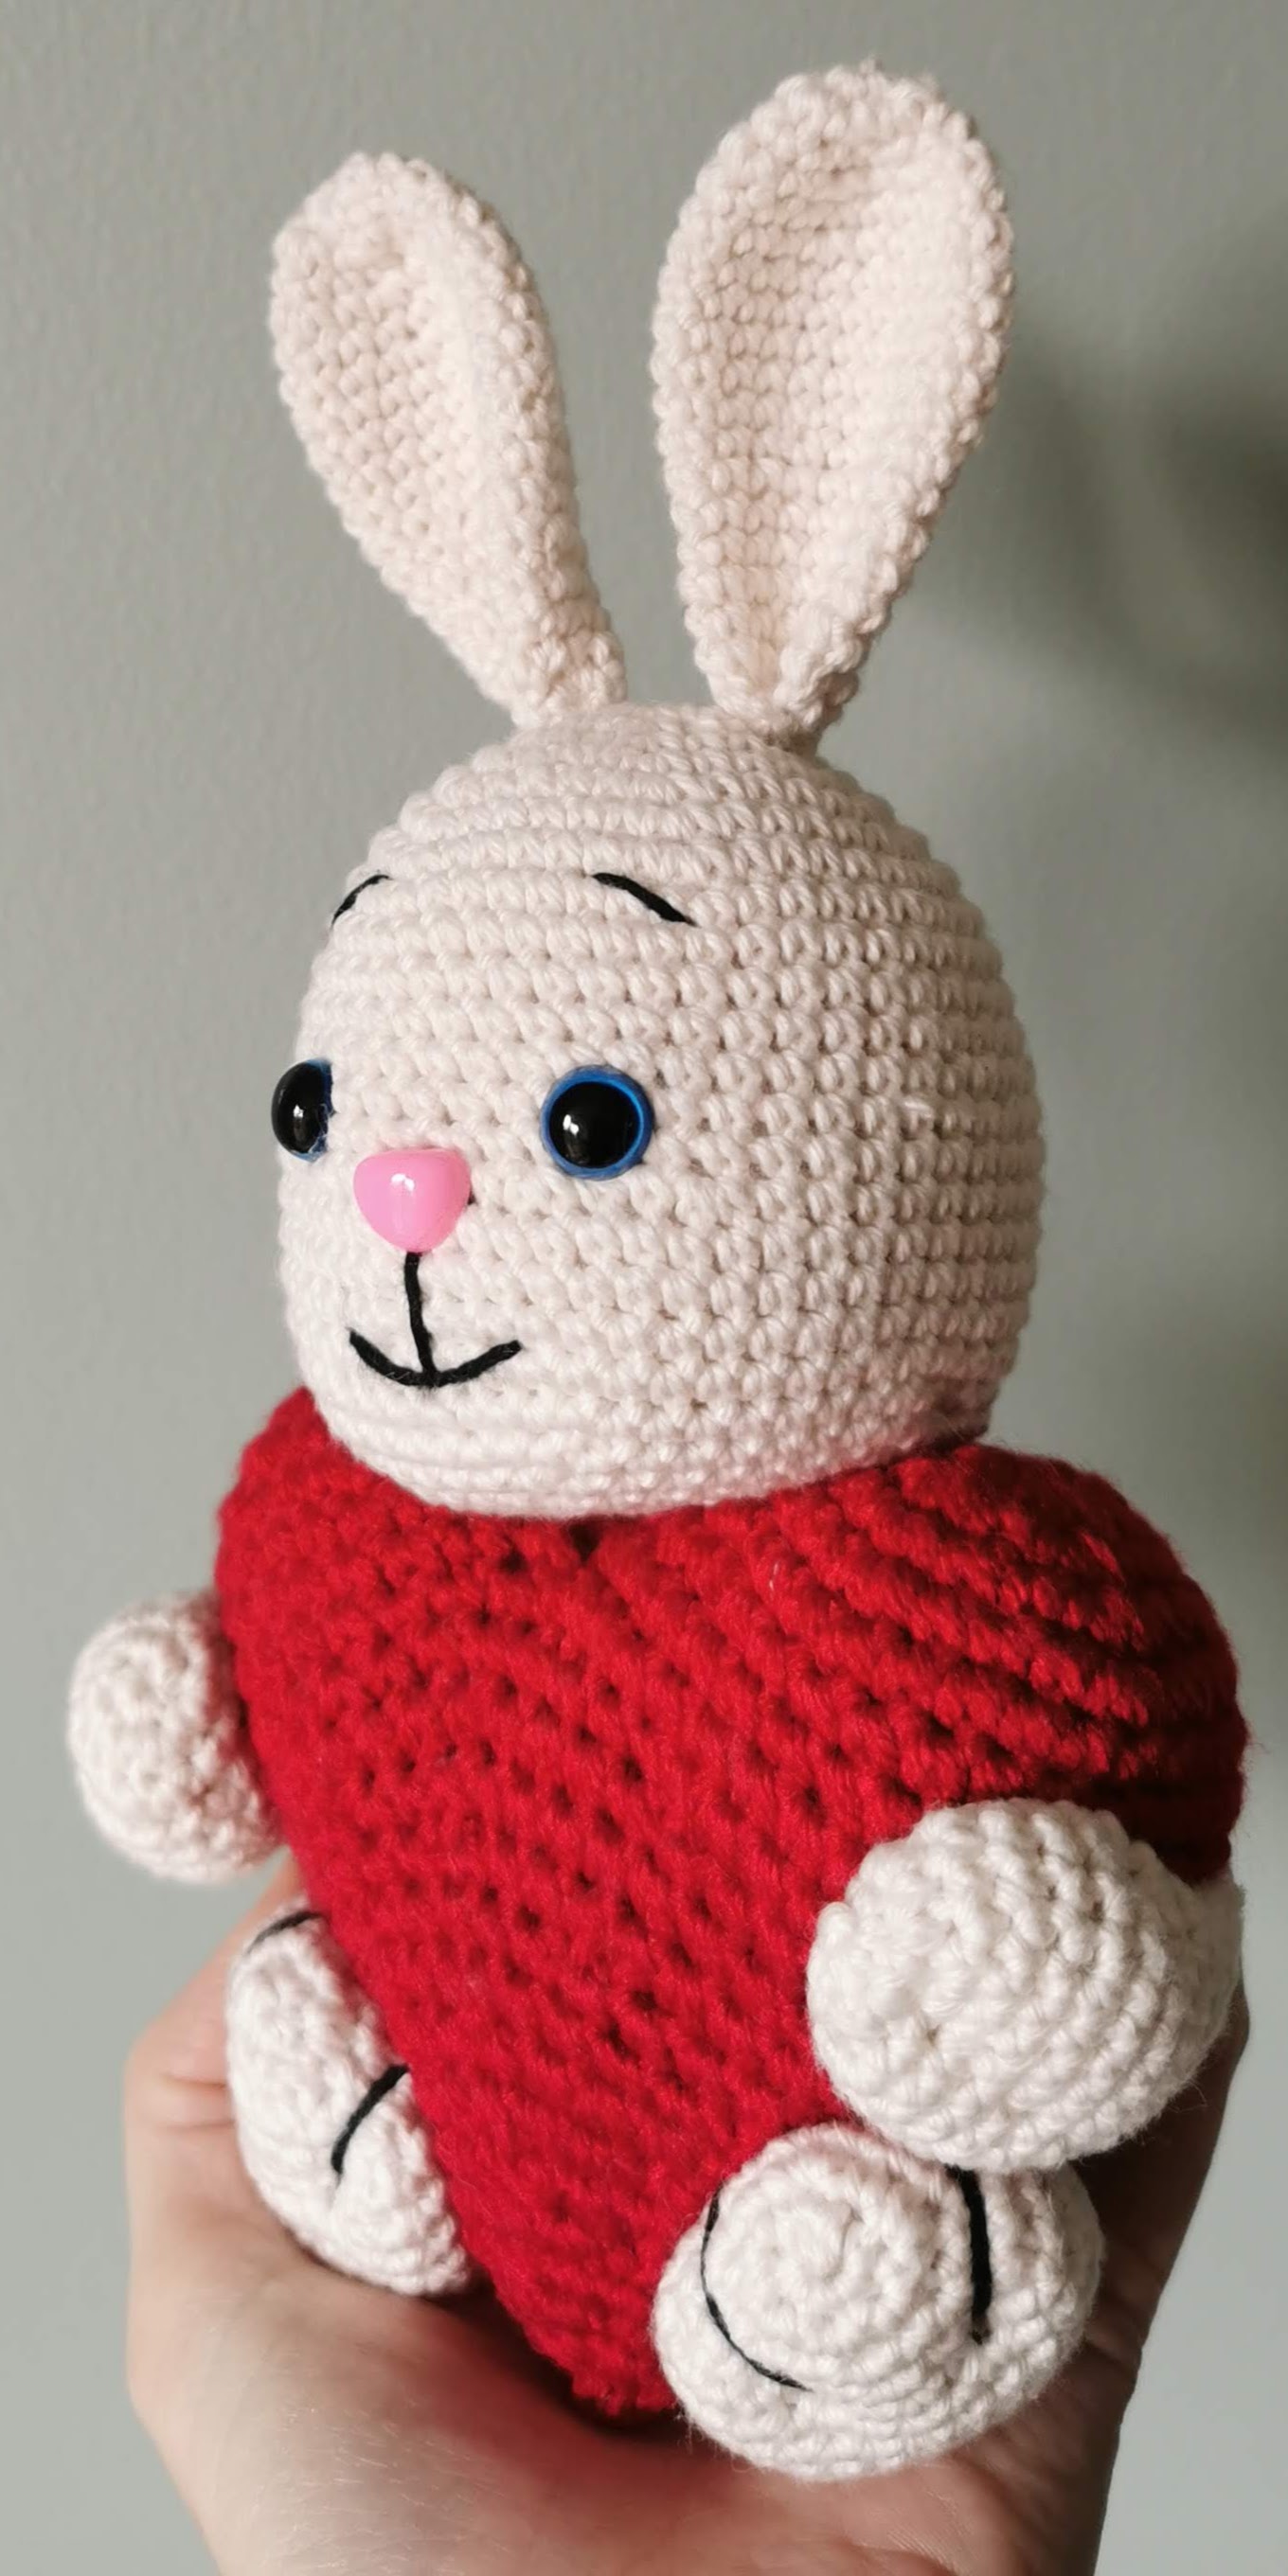
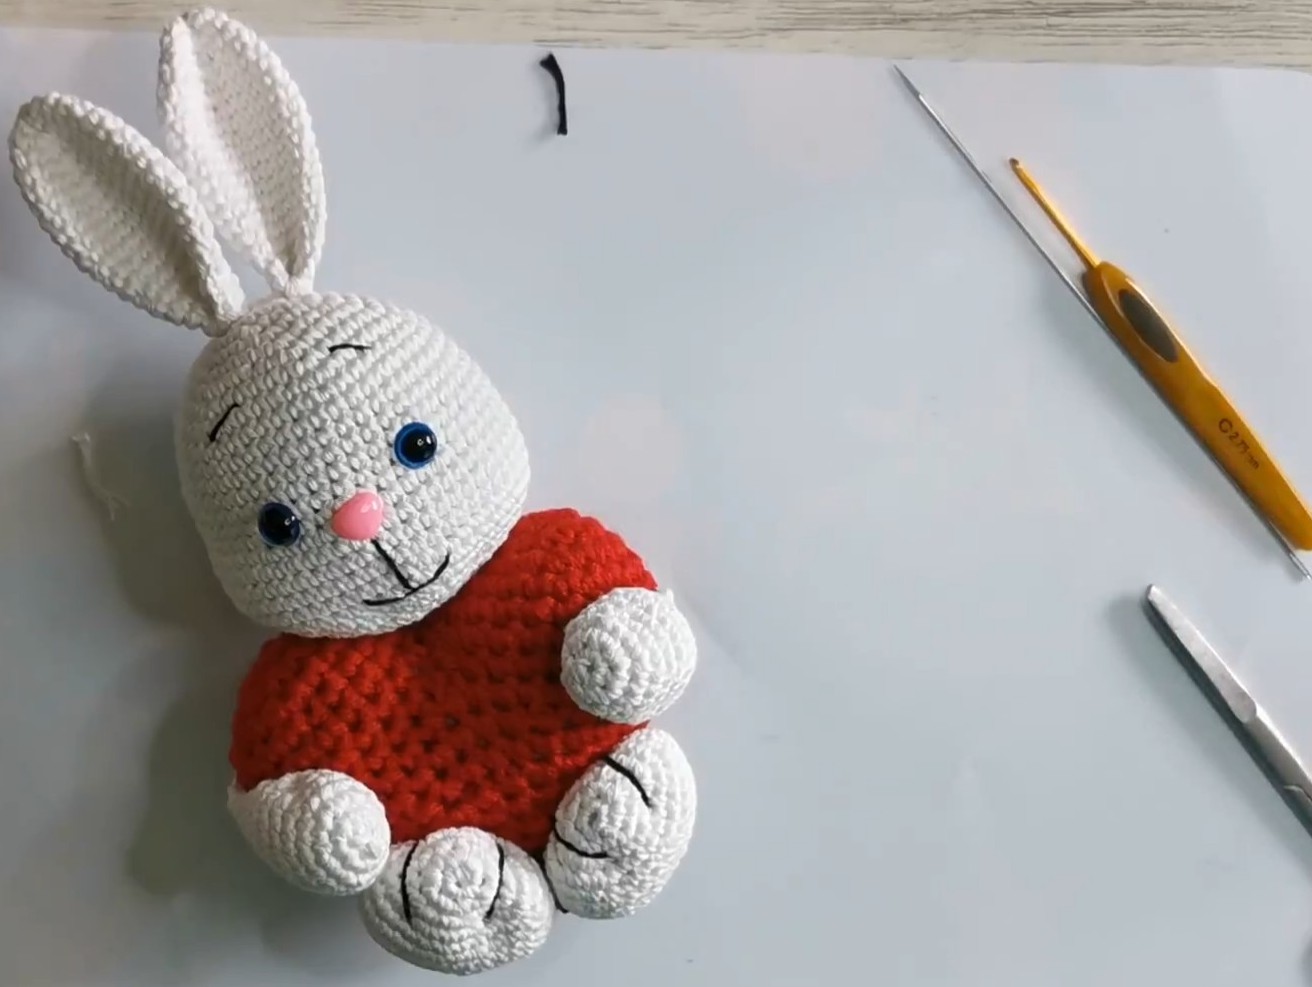
Thank you for joining me! Are you ready to get started? Below I have outlined all the supplies you will need. I would advise to make the love heart with a bigger sized hook than the bunny. The love heart is meant to stand out more so you don’t want to end up with a heart that is too small.
If you choose to use DK acrylic yarn for both the heart and the bunny, I would advise using a hook size in 3.5mm to 4.0mm hook for the heart and a full size down for the bunny, 2.5mm or 3.00mm hook.
As always, I appreciate any feedback so please feel free to contact me with any questions. You can leave feedback here
Happy Woolly Magicing!
Supplies:
DK Cotton Yarn/DK Acrylic Yarn
Polyester stuffing
Scissors and sewing needle
2.5mm crochet hook for head, ears, arms & legs. I used
3.5mm crochet hook for heart. I used Hayfield DK Classic Red

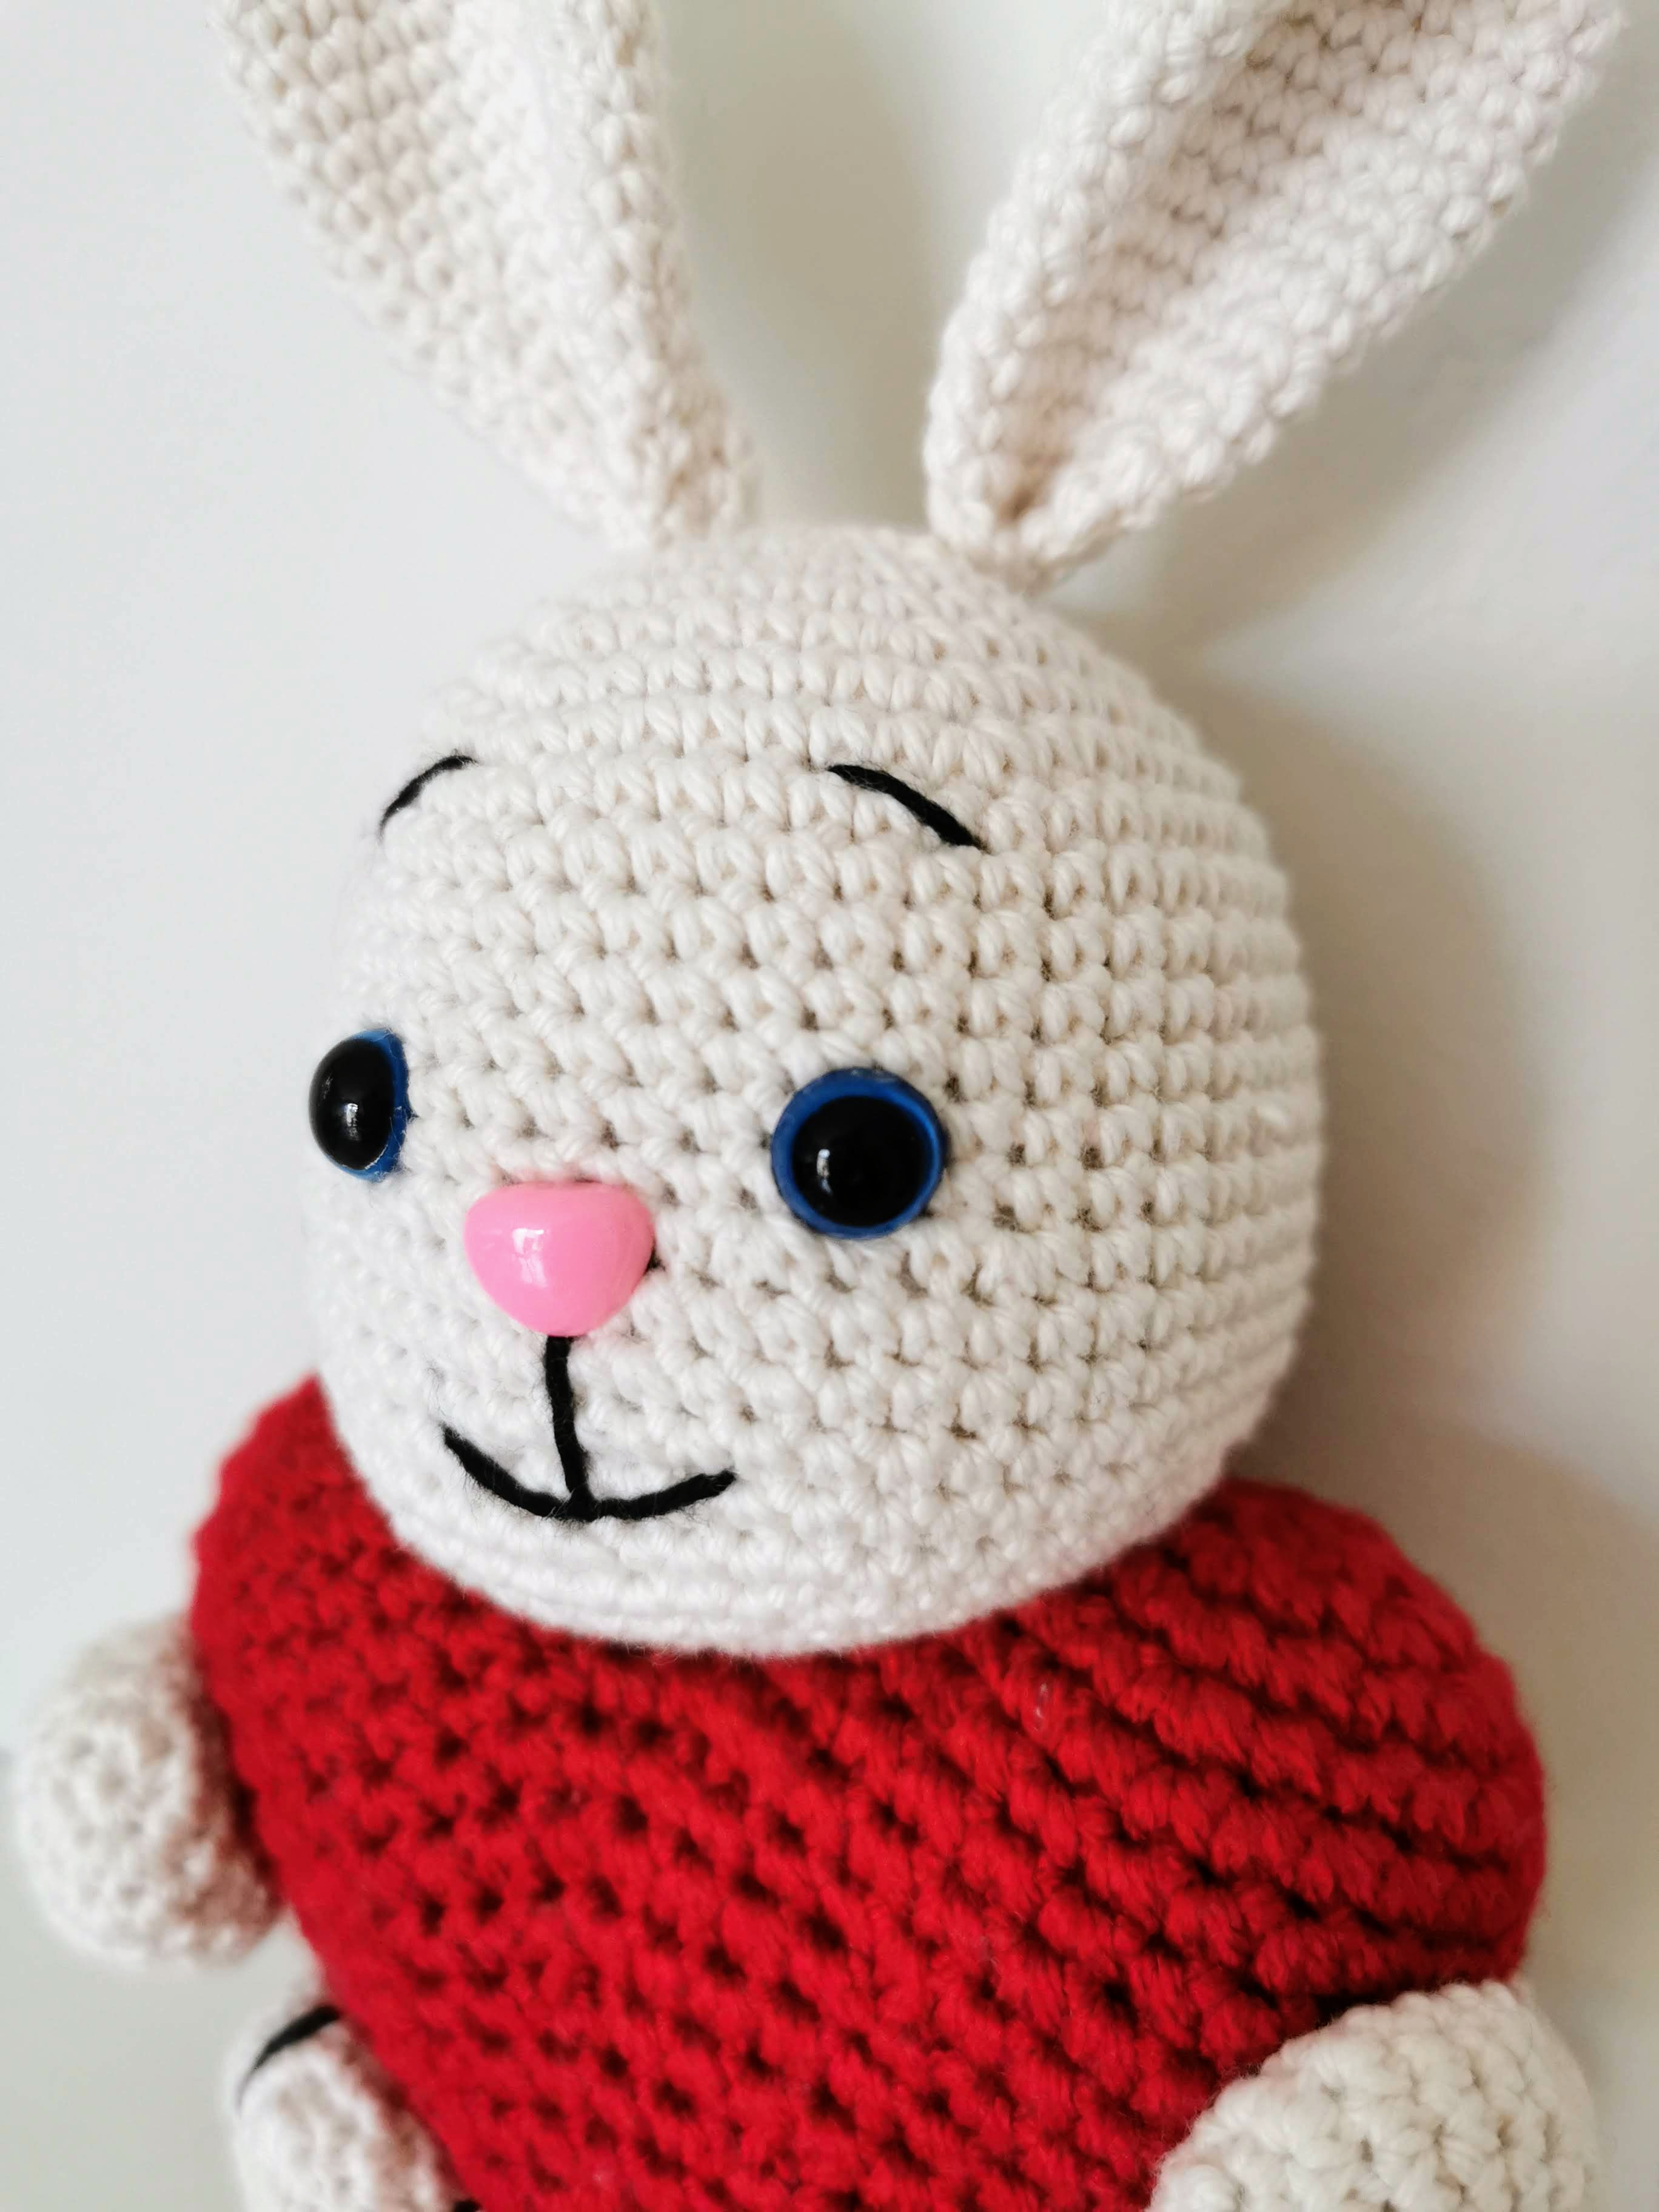
2 x safety eyes, 8mm in size
1 x pink nose, 8mm in size
Black embroidery thread or black yarn
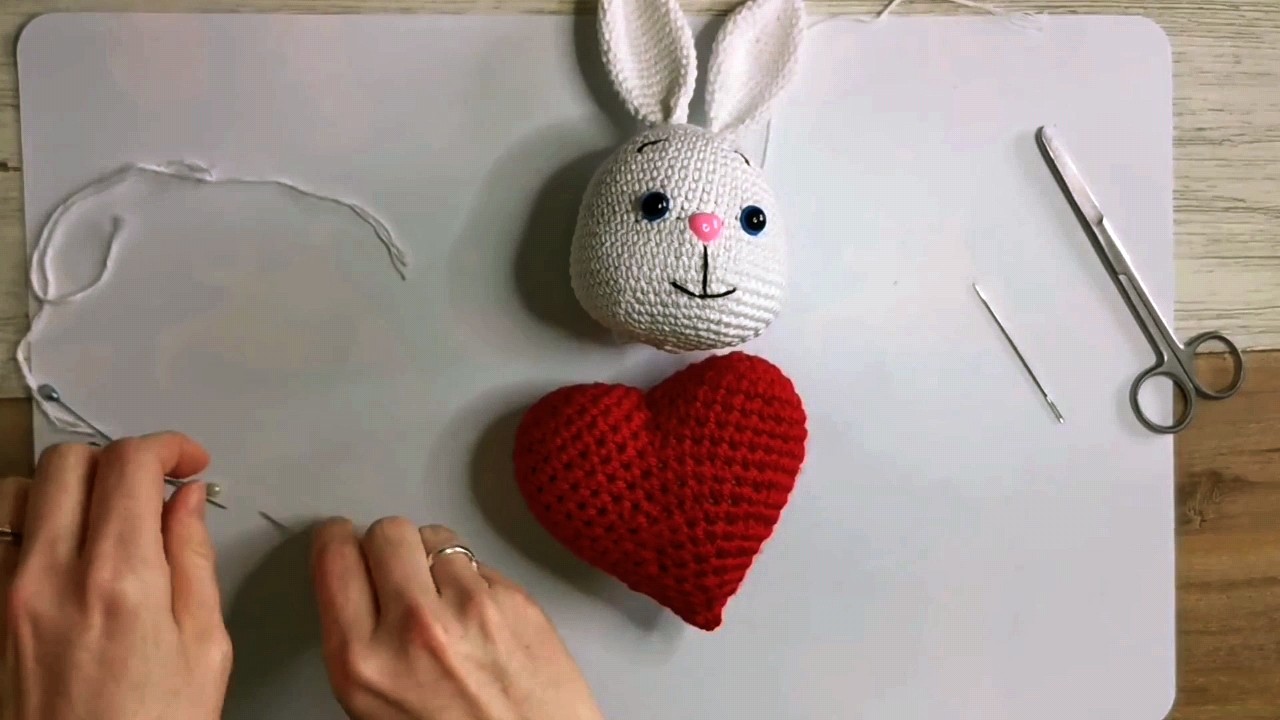
**This pattern is not mine, it is from this website https://amigurum.com/. All photos & video tutorials have been created, filmed and edited by me***
Skill Level: Beginner
Abbreviations:
sl st = slip stitch
sc = single crochet
inc = increase, 2 sc in one st
inv dec = decrease, 2 sc together
(..) = repeat the number in the brackets
[..] = total number of stitches
I decided to include the invisible decrease (INV DEC) stitch in this tutorial. If you find it too difficult just continue with the normal decrease stitch (DEC).
Heart
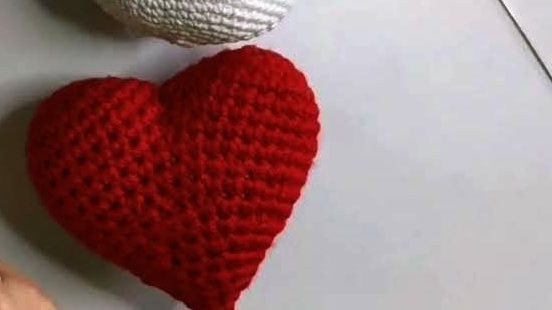
I have previously created a tutorial on how to crochet a love heart. If you get stuck please refer back to that one. Take note that the pattern below is slightly bigger with more rounds.
Part 1
R1: 6sc in magic circle [6]
R 2: (inc) x 6 [12]
R 3: (1sc, inc) x 6 [18]
R 4: (2sc, inc) x 6 [24]
Cut the yarn and finish off
Part 2
Do not cut the yarn on the last round
R 1: 6sc in mr [6]
R 2: (inc) x 6 [12]
R 3: (1sc, inc) x 6 [18]
R 4 (2sc, inc) x 6 [24]
R 5: Join part 1 to part 2 to with 4 slip stitches (slst), 20sc (part 1), 20sc (part 2) [40]
(you lose 8 stitches when slip stitching both sides together)
R 6: 40sc [40]
R 7: 8sc, dec, 20 sc, dec, 10 sc [38]
R 8: (19 sc, dec) x 2 [36]
R 9: (7 sc, dec) x 4 [32]
R 10: 6 sc, dec, 16 sc, dec, 8 sc [30]
R 11: (14 sc, dec) x 2 [28]
R 12: (6 sc, dec) x 4 [24]
R 13: (5 sc, dec) x 4 [20]
R 14: (4 sc, dec) x 4 [16]
Stuff after each round
R 15: (3 sc, dec) x 4 [12]
R 16: (2 sc, dec) x 4 [8]
R 17: (1 sc, dec) x 4 [4]
Finish off and sew the hole
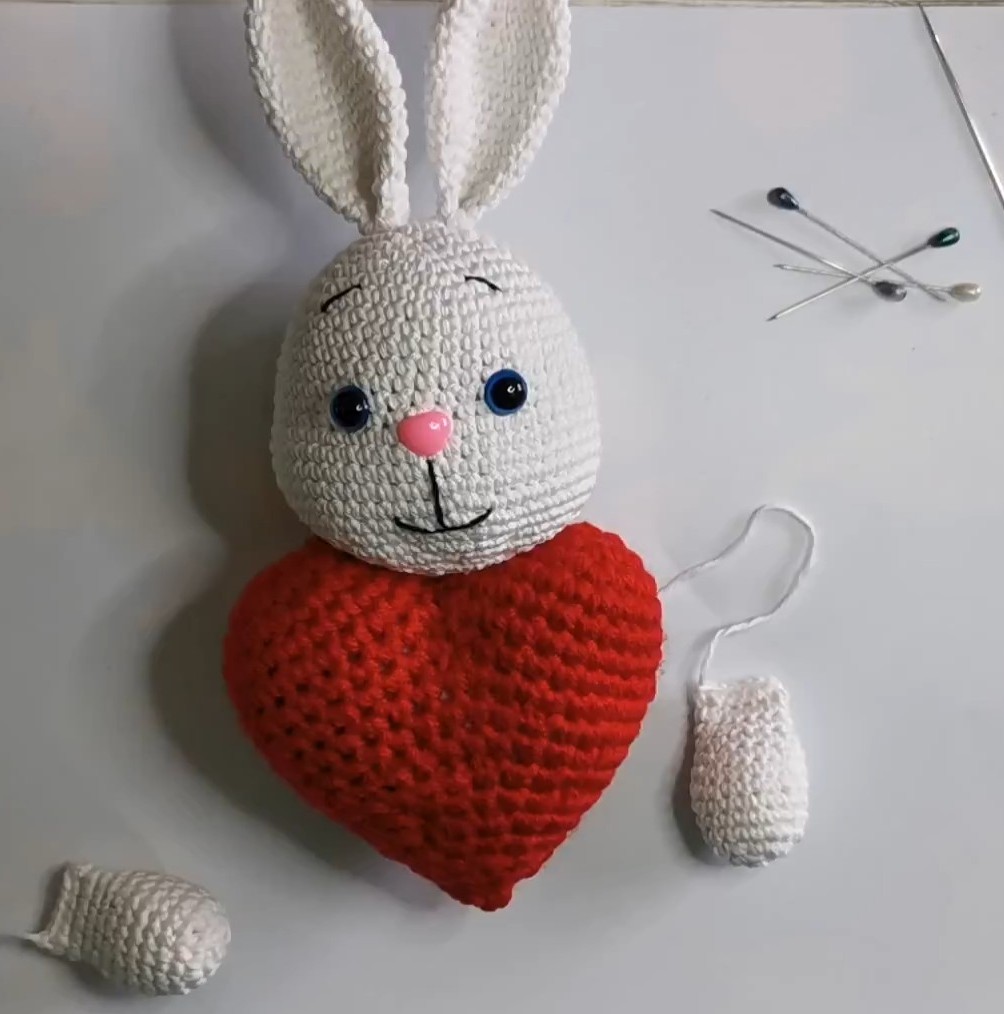
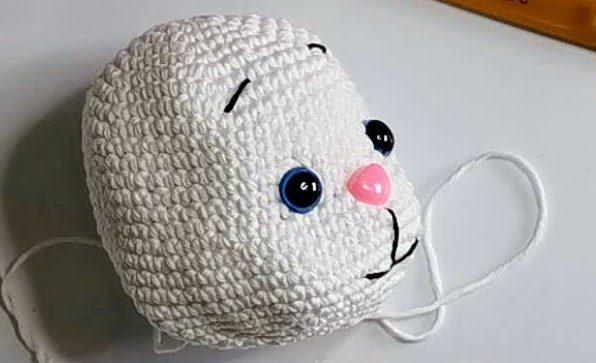
Head
R 1: 6sc in magic circle [6]
R 2: (inc) x 6 [12]
R 3: (1sc, inc) x 6 [18]
R 4: (2sc, inc) x 6 [24]
R 5: (3sc, inc) x 6 [30]
R 6: (4sc, inc) x 6 [36]
R 7: (5sc, inc) x 6 [42]
R 8: (6sc, inc) x 6 [48]
R 9 – R 15: 48sc (7 rounds) [48]
R 16: 15sc, (2sc,inc) x 6,15sc [54]
R 17 – R 21: 54sc (5 rounds) [54]
Insert your 2 safety eyes between round 14 & 15 and insert safety nose inline with the bottom of the eyes
R 22: (7sc, dec) x 6 [48]
R 23: (6sc, dec) x 6 [42]
R 24: (5sc, dec) x 6 [36]
R 25: (4sc, dec) x 6 [30]
Stuff as you decrease after each round
R 26: (3sc, dec) x 6 [24]
R 27: (2sc, dec) x 6 [18]
R 28: (1sc, dec) x 6 [12]
R 29: (dec) x 6 [6]
Finish off and sew the hole
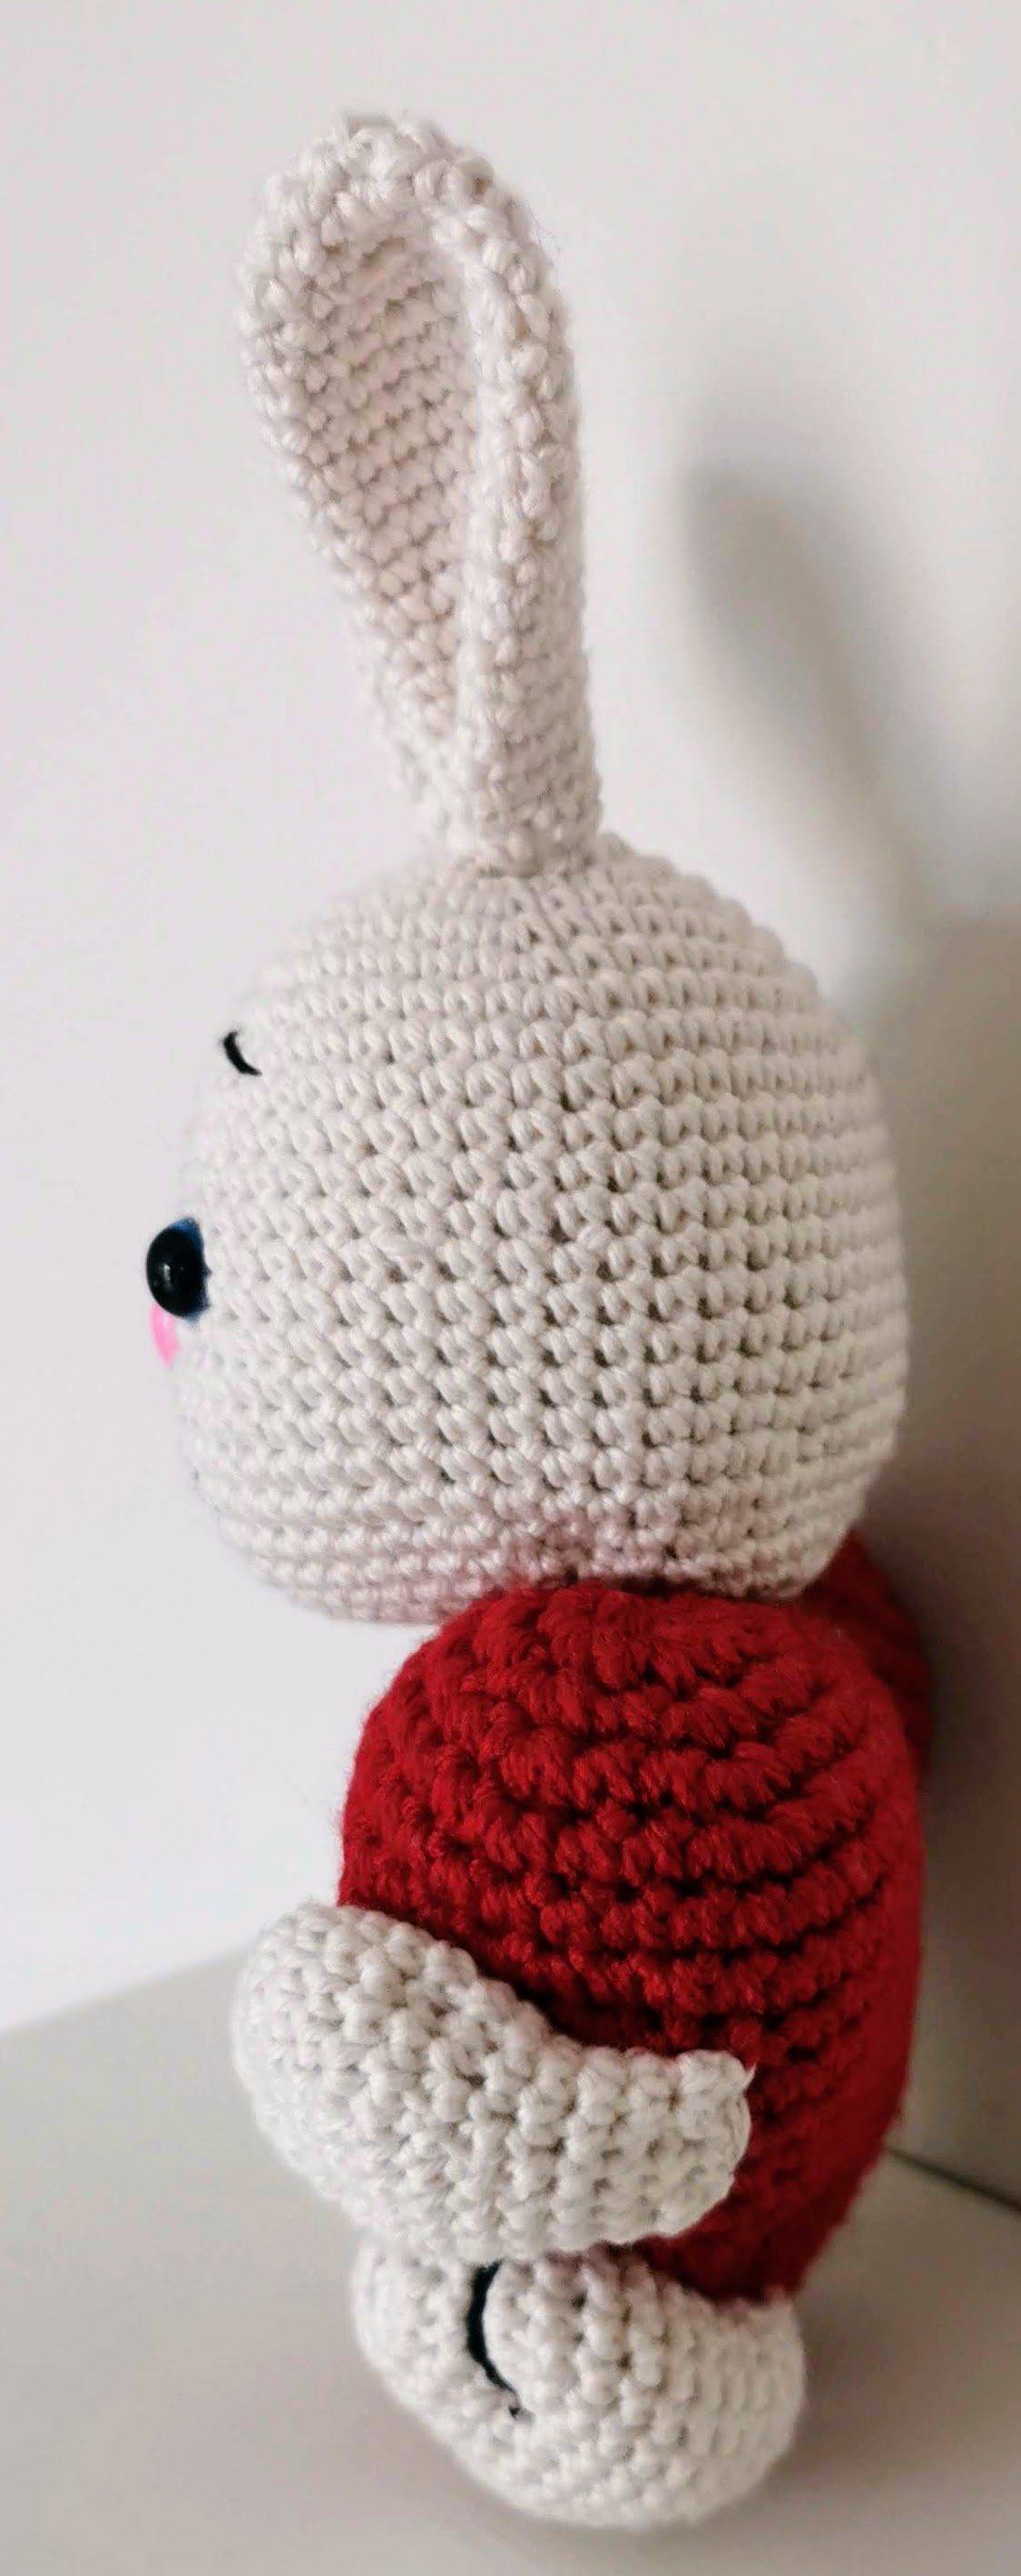
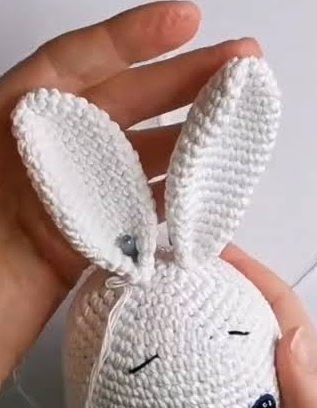
Ears (make 2)
This video shows how to make the ear, arm & leg
R 1: 6sc in magic circle [6]
R 2: (inc) x 6 [12]
R 3: 12sc [12]
R 4: (1sc, inc) x 6 [18]
R 5: 18sc [18]
R 6: (5sc, inc) x 3 [21]
R 7-R11: 21sc (5 rounds) [21]
R 12: (5sc, dec) x 3 [18]
R 13: 18sc [18]
R 14: (7sc, dec) x 2 [16]
R 15: 16sc [16]
R 16: (6sc, dec) x 2 [14]
R 17: 14sc [14]
R 18: (5sc, dec) x 2 [12]
Finish off and sew the hole
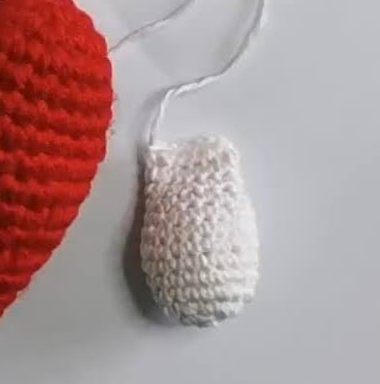
Arms (make 2)
R 1: 6sc in magic circle [6]
R 2: (inc) x 6 [12]
R 3: (1sc, inc) x 6. [18]
R 4 – R 5: 18sc (2 rounds) [18]
R 6: (5sc, inc) x 3 [21]
R 7: 21sc [21]
R 8: (5sc, in) x 3 [18]
R 9: (4sc, inc) x 3 [15]
R 10: (3sc, inc) x 3 [12]
R 11-R 13: 12sc [12]
Finish off and sew the hole
Legs (make 2)

R 1: 6sc in magic circle [6]
R 2: (inc) x 6 [12]
R 3: (1sc, inc) x 6 [18]
R 4: (2sc, inc) x 6 [24]
R 5: 24sc [24]
R 6: (3sc, inc) x 6 [30]
R 7-R 9: 30sc [30]
R 10: (3sc, dec) x 6 [24]
R 11: 24sc [24]
R 12: (10sc, dec) x 2 [22]
R 13: (9sc, dec) x 2 [20]
R 14: (8sc, dec) x 2 [18]
R 15: (1sc, dec) x 6 [12]
R 16: ( dec ) x 6 [6]
Finish off and sew the hole
You can put the black thread on each leg at this point or wait until the legs are sewn on to the heart first. I waited until both legs were sewn on then added the black thread.
